dependencies = [
    "MainContentExtractor>=0.0.4",
    "beautifulsoup4>=4.12.3",
    "httpx>=0.27.2",
    "langchain>=0.3.14",
    "langchain-openai>=0.2.14",
    "langchain-anthropic>=0.3.1",
    "langchain-fireworks>=0.2.5",
    "langchain-aws>=0.2.10",
    "langchain-google-genai>=2.0.8",
    "pydantic>=2.10.4",
    "python-dotenv>=1.0.1",
    "requests>=2.32.3",
    "posthog>=3.7.0",
    "playwright>=1.49.0"
]
先熟悉一下它的依赖包
1、
MainContentExtractor
第一个是一个抽取HTML的主要信息的一个库,维护时间也不新,都两年前了
2、
beautifulsoup4就不说了,老演员了
3、
httpx这个是个新库,好像大家最近都流行用这个了
HTTPX is a fully featured HTTP client for Python 3, which provides sync and async APIs,
and support for both HTTP/1.1 and HTTP/2.
看了一下官网介绍,核心就是,支持更多协议、异步同步接口
>>> import httpx
>>> r = httpx.get('https://www.example.org/')
>>> r
<Response [200 OK]>
>>> r.status_code
200
>>> r.headers['content-type']
'text/html; charset=UTF-8'
>>> r.text
'<!doctype html>\n<html>\n<head>\n<title>Example Domain</title>...'
emmmm,确实非常简单
4、
langchain没什么好说的,库应该有所更新,稍后去看看
5、
    "langchain-openai>=0.2.14",
    "langchain-anthropic>=0.3.1",
这俩也都没什么好说的,应该是剥离出来了的openai的支持和anthropic的支持
6、
langchain-fireworks看了一下官网,就是一个优化过的调用平台
7、
    "langchain-aws>=0.2.10",
    "langchain-google-genai>=2.0.8",
同理,也是另外两个平台的支持库
8、
pydantic大名鼎鼎的数据校验库
9、
python-dotenv读环境变量用的库
10、
requests大名鼎鼎的网络请求库,估计是还有部分库还在用它吧
11、
posthog我擦,这是一个用户数据打点的平台,与功能无关
12、
playwright微软的游览器操作库
=========================================
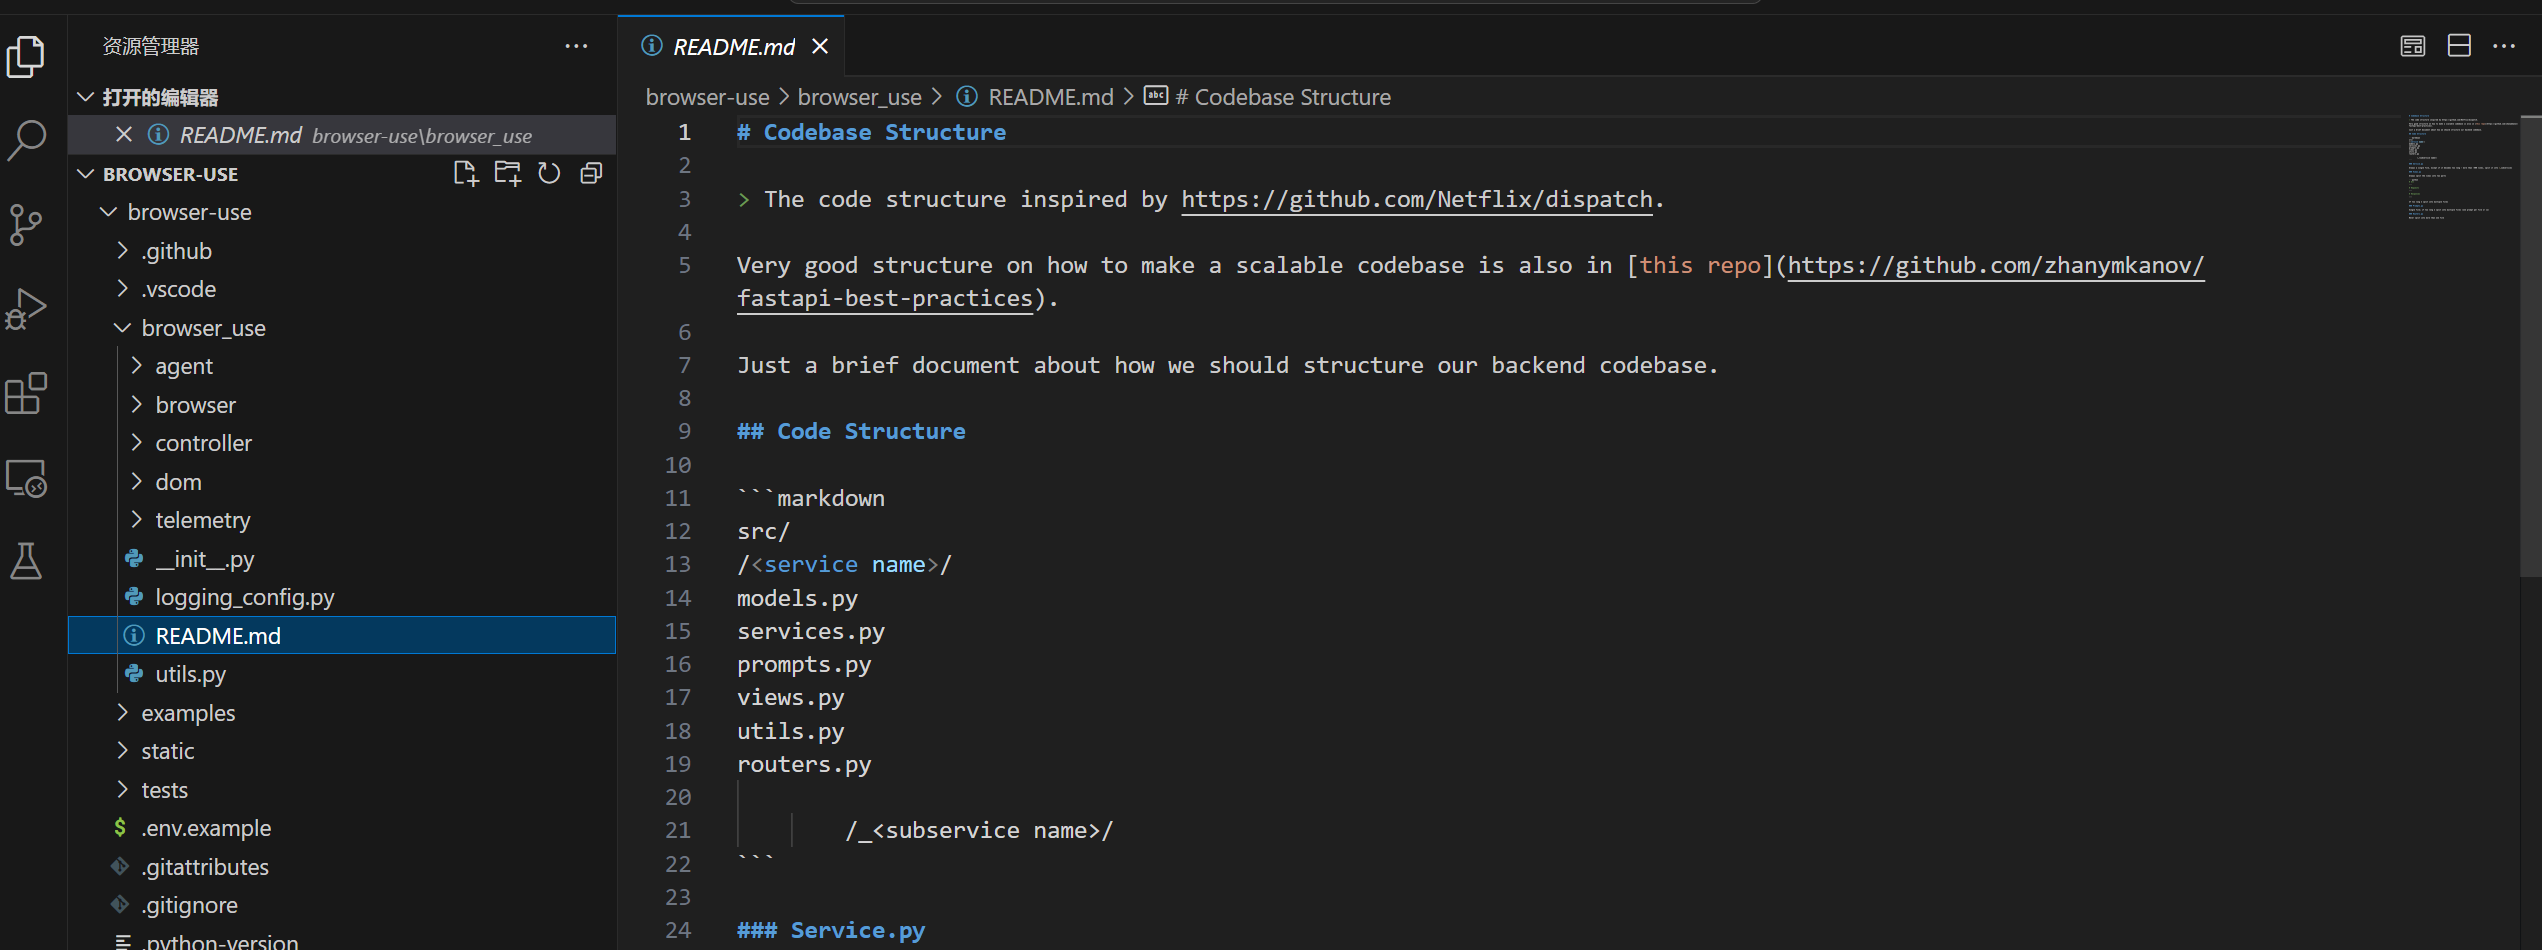
阅读的开始,人家的README.md里
少见的有一份关于代码风格等等的叙述,这确实少见
1、
agent目录,prompts.py
	def important_rules(self) -> str:
		"""
		Returns the important rules for the agent.
		"""
		text = """
1. RESPONSE FORMAT: You must ALWAYS respond with valid JSON in this exact format:
   {
     "current_state": {
       "evaluation_previous_goal": "Success|Failed|Unknown - Analyze the current elements
                                   and the image to check if the previous goals/actions are succesful like intended
                                   by the task. Ignore the action result. The website is the ground truth. Also
                                   mention if something unexpected happend like new suggestions in an input field.
                                   Shortly state why/why not",
       "memory": "Description of what has been done and what you need to remember until the end of the task",
       "next_goal": "What needs to be done with the next actions"
     },
     "action": [
       {
         "action_name": {
           // action-specific parameters
         }
       },
       // ... more actions in sequence
     ]
   }

2. ACTIONS: You can specify multiple actions to be executed in sequence.

   Common action sequences:
   - Form filling: [
       {"input_text": {"index": 1, "text": "username"}},
       {"input_text": {"index": 2, "text": "password"}},
       {"click_element": {"index": 3}}
     ]
   - Navigation and extraction: [
       {"open_new_tab": {}},
       {"go_to_url": {"url": "https://example.com"}},
       {"extract_page_content": {}}
     ]


3. ELEMENT INTERACTION:
   - Only use indexes that exist in the provided element list
   - Each element has a unique index number (e.g., "33[:]<button>")
   - Elements marked with "_[:]" are non-interactive (for context only)

4. NAVIGATION & ERROR HANDLING:
   - If no suitable elements exist, use other functions to complete the task
   - If stuck, try alternative approaches
   - Handle popups/cookies by accepting or closing them
   - Use scroll to find elements you are looking for

5. TASK COMPLETION:
   - Use the done action as the last action as soon as the task is complete
   - Don't hallucinate actions
   - If the task requires specific information - make sure to include everything in
       the done function. This is what the user will see.
   - If you are running out of steps (current step), think about speeding it up,
       and ALWAYS use the done action as the last action.

6. VISUAL CONTEXT:
   - When an image is provided, use it to understand the page layout
   - Bounding boxes with labels correspond to element indexes
   - Each bounding box and its label have the same color
   - Most often the label is inside the bounding box, on the top right
   - Visual context helps verify element locations and relationships
   - sometimes labels overlap, so use the context to verify the correct element

7. Form filling:
   - If you fill a input field and your action sequence is interrupted, most often a
   list with suggestions poped up under the field and you need to first select the
   right element from the suggestion list.

8. ACTION SEQUENCING:
   - Actions are executed in the order they appear in the list
   - Each action should logically follow from the previous one
   - If the page changes after an action, the sequence is interrupted and you
    get the new state.
   - If content only disappears the sequence continues.
   - Only provide the action sequence until you think the page will change.
   - Try to be efficient, e.g. fill forms at once, or chain actions where nothing
   changes on the page like saving, extracting, checkboxes...
   - only use multiple actions if it makes sense.
"""
第一部分的提示词是关于重要的规则的
定义了
1、返回格式;
2、动作序列的定义;
3、可互动元素的定义;
4、寻找和游览的规则;
5、任务结束的定义
6、可视化元素的提示
7、表单填写
8、动作序列
def input_format(self) -> str:
return """
INPUT STRUCTURE:
1. Current URL: The webpage you're currently on
2. Available Tabs: List of open browser tabs
3. Interactive Elements: List in the format:
index[:]<element_type>element_text</element_type>
- index: Numeric identifier for interaction
- element_type: HTML element type (button, input, etc.)
- element_text: Visible text or element description
Example:
33[:]<button>Submit Form</button>
_[:] Non-interactive text
Notes:
- Only elements with numeric indexes are interactive
- _[:] elements provide context but cannot be interacted with
"""接下来定义的是输入的格式
这块看一下就知道了
AGENT_PROMPT = f
"""You are a precise browser automation agent that interacts with websites
through structured commands. Your role is to:
1. Analyze the provided webpage elements and structure
2. Plan a sequence of actions to accomplish the given task
3. Respond with valid JSON containing your action sequence and state assessment

Current date and time: {time_str}

{self.input_format()}

{self.important_rules()}

Functions:
{self.default_action_description}

Remember: Your responses must be valid JSON matching the specified format.
Each action in the sequence must be valid."""
return SystemMessage(content=AGENT_PROMPT)
接下来是AGENT的人格定义部分
它的prompt本身比cline那边要好读的多
=================================================
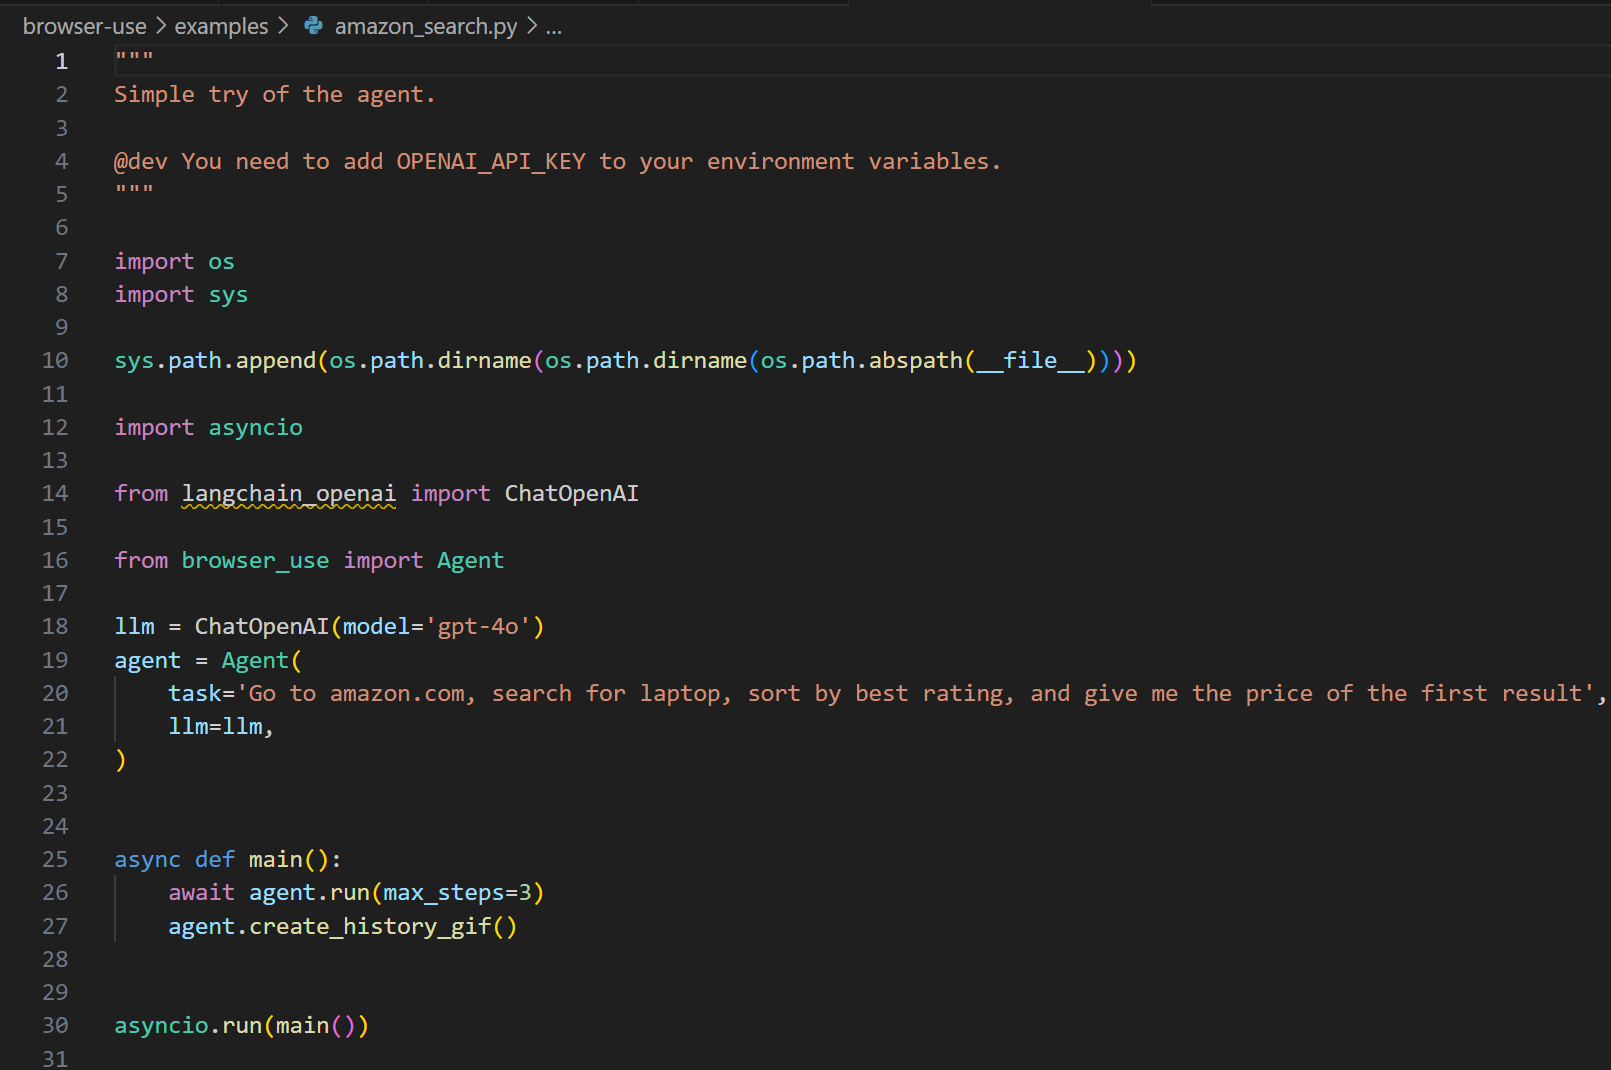
从example入手,看到,其实关键的入口点就是agent对象
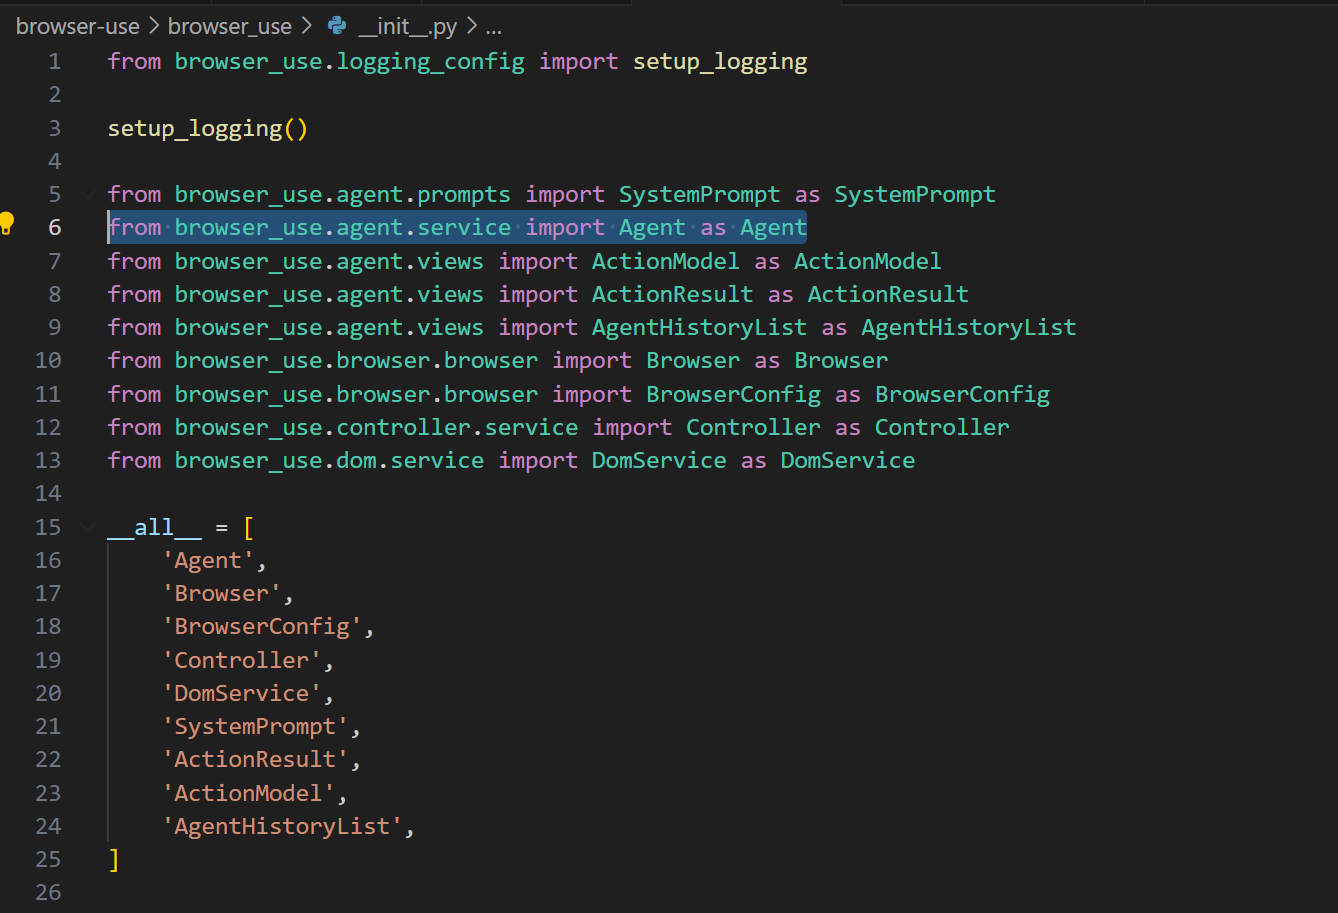
然后看到了,实际上Agent对象是在agent目录下的service里面
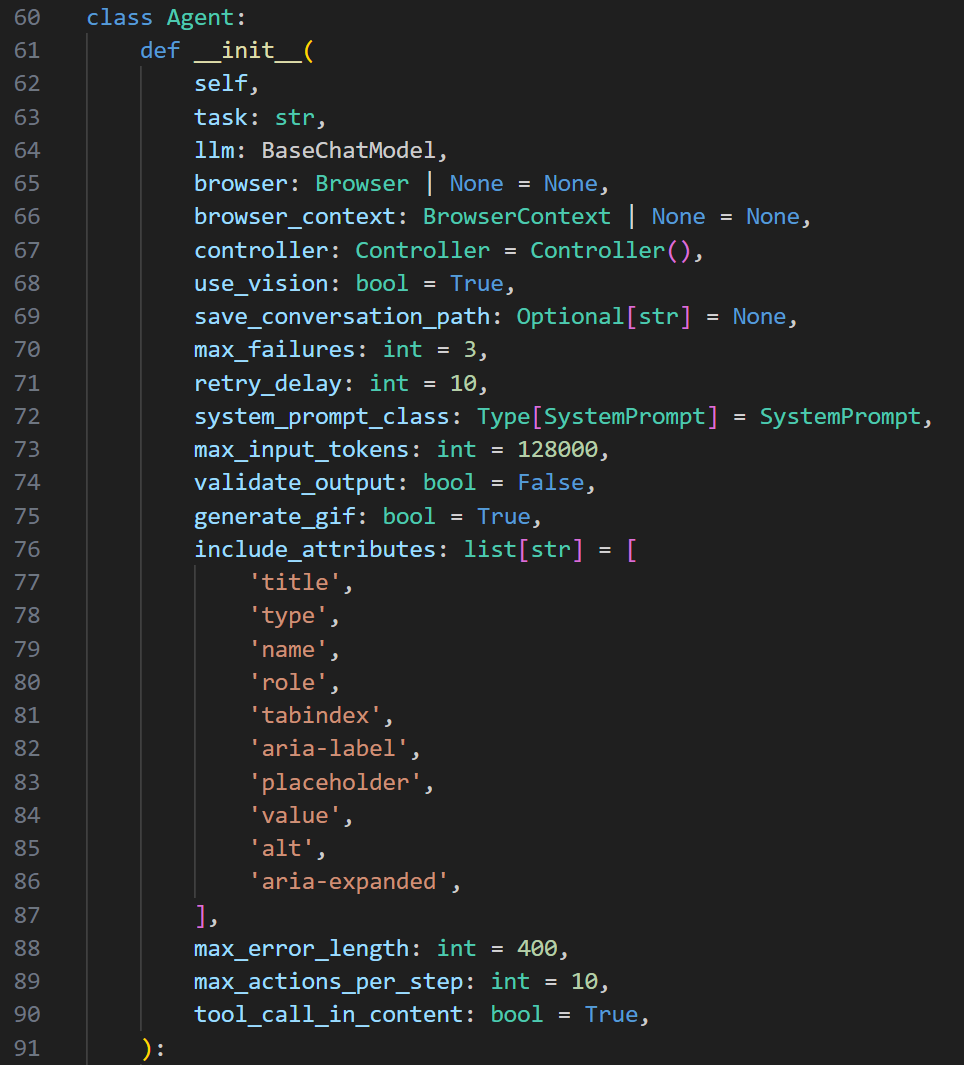
init自己看一下就行,需要以工具的文档来辅助一下也可以
然后接下来就是一堆的类似依赖注入的过程,组装好对象本身
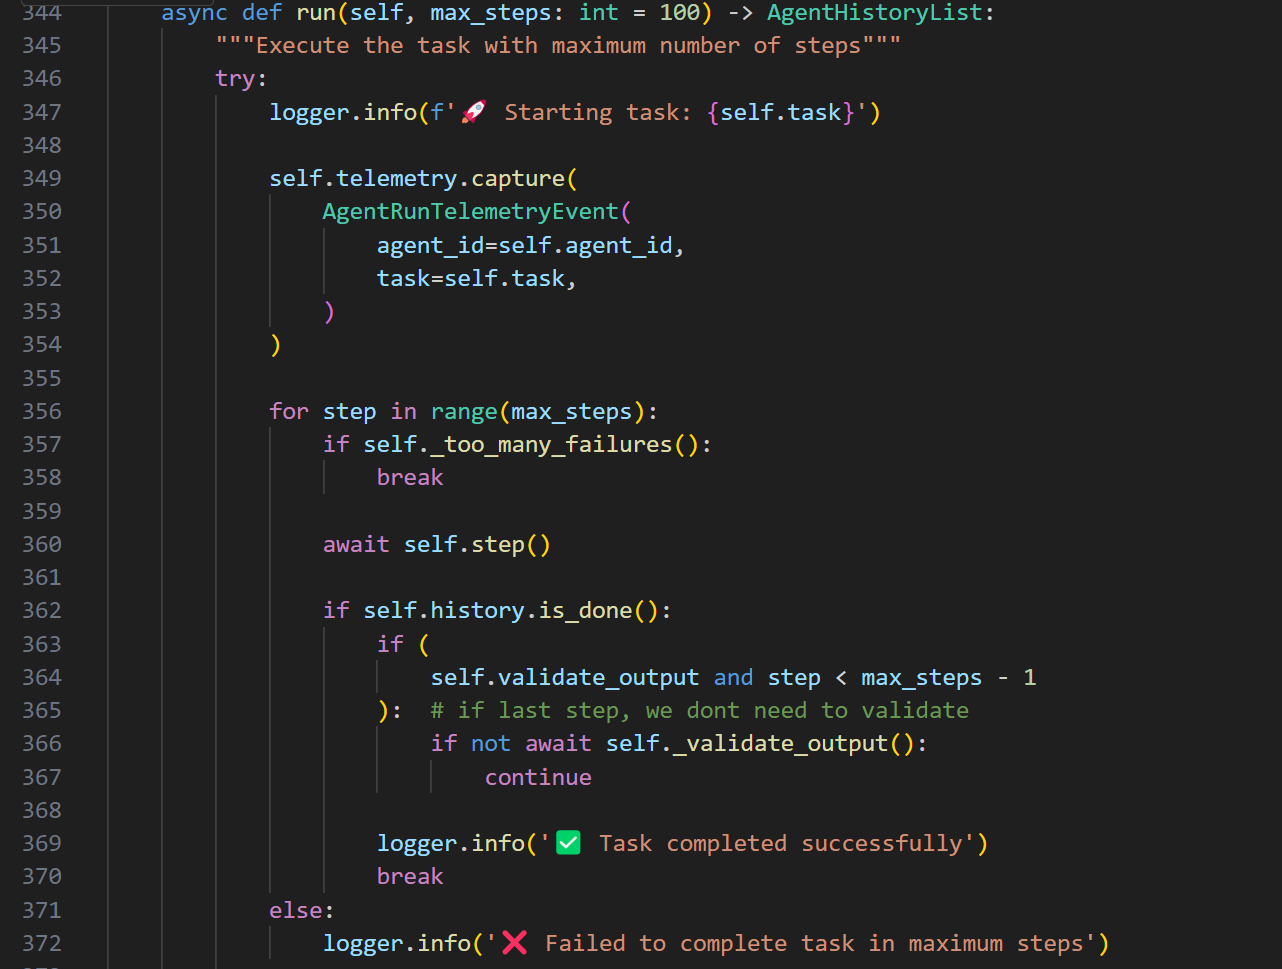
接下来是入口的启动,就是run函数了
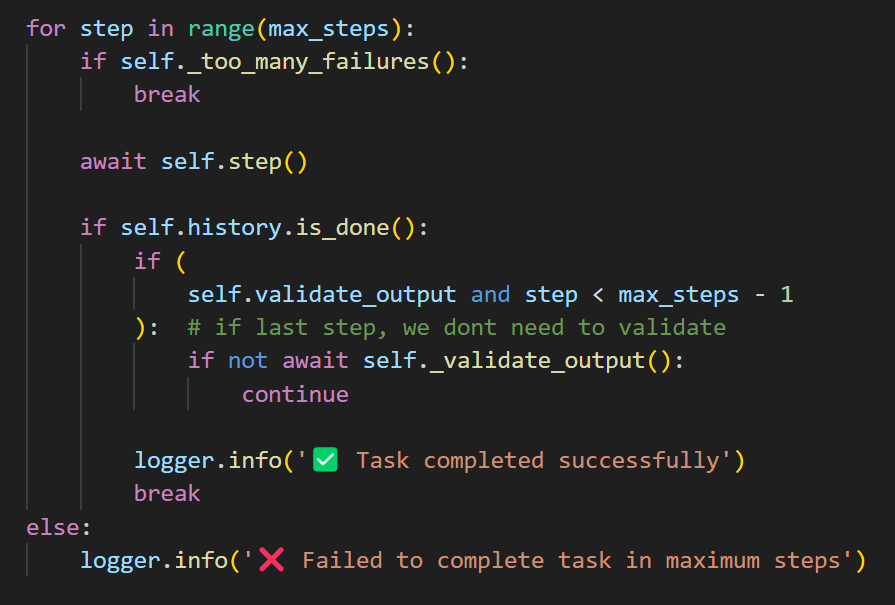
能看出来其实run函数就只是一个迭代器
那么真正的执行实际上是在step函数里了
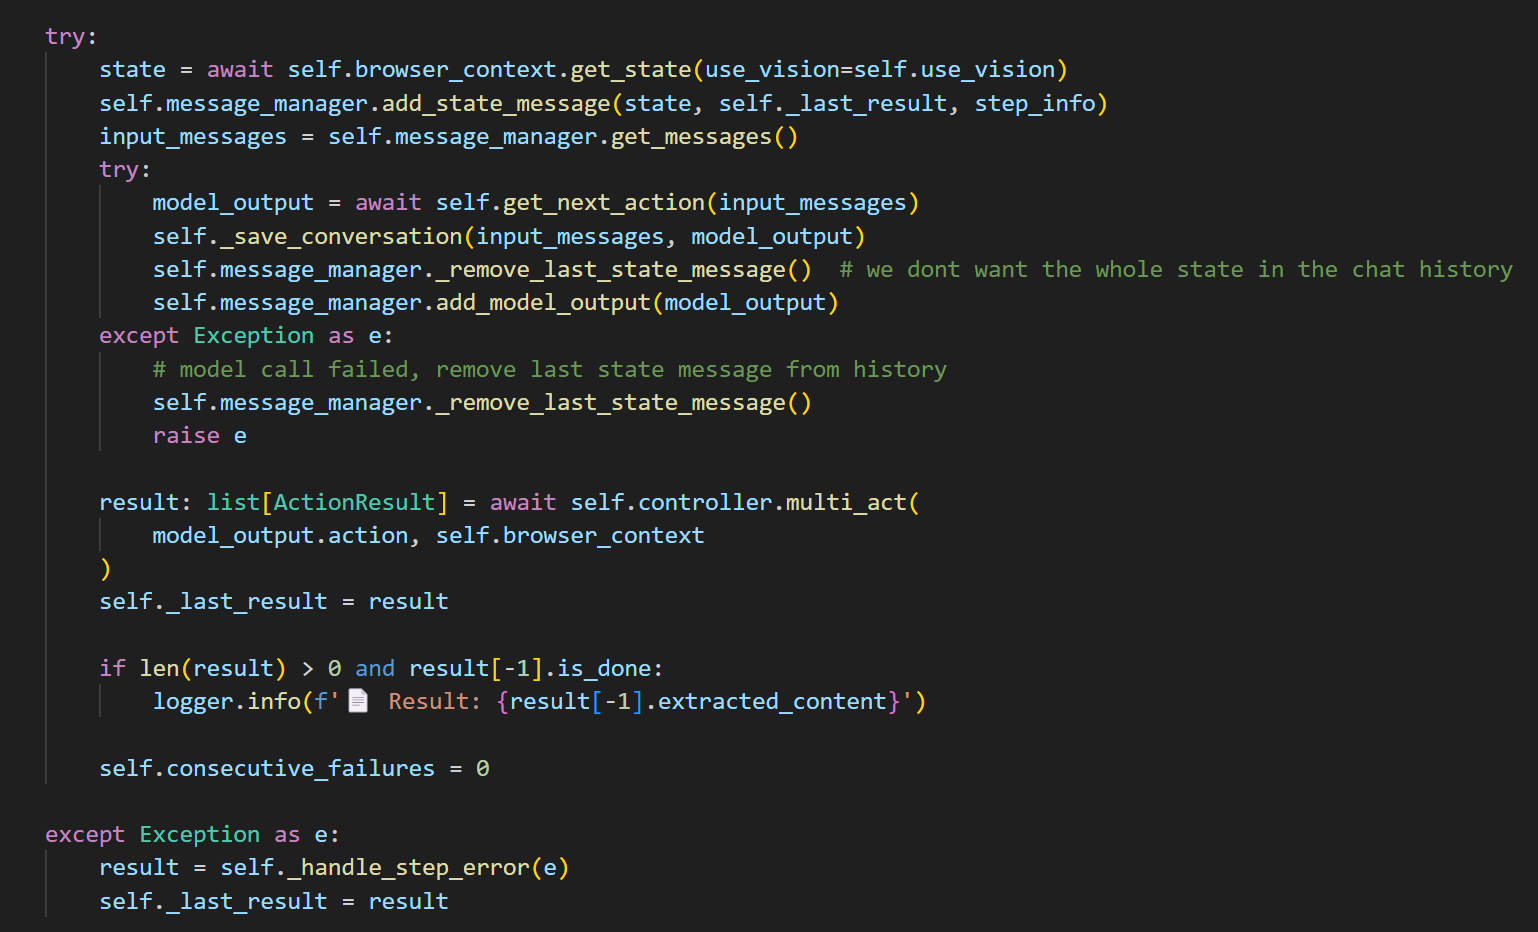
看step函数
核心其实是self.controller.multi_act
https://python.langchain.com/v0.1/docs/modules/model_io/chat/structured_output/
然后看了一下官方的文档,是啥意思
from langchain_core.pydantic_v1 import BaseModel, Field


class Joke(BaseModel):
    setup: str = Field(description="The setup of the joke")
    punchline: str = Field(description="The punchline to the joke")
先定义个类,以及它拥有的Field吧,可以这么理解
然后
model = ChatOpenAI(model="gpt-3.5-turbo-0125", temperature=0)
structured_llm = model.with_structured_output(Joke)
初始化一个结构化的llm,传入的参数实际上是在限定这个llm本身的输出
structured_llm.invoke("Tell me a joke about cats")接着调用
Joke(setup='Why was the cat sitting on the computer?', punchline='To keep an eye on the mouse!')然后你就能拿到一问一答的joke答案了。。。
哈哈哈,好吧
它这么做等效于JSON形式
structured_llm = model.with_structured_output(Joke, method="json_mode")
structured_llm.invoke(
    "Tell me a joke about cats, respond in JSON with `setup` and `punchline` keys"
)
Joke(setup='Why was the cat sitting on the computer?', punchline='Because it wanted to keep an eye on the mouse!')
有点意思哈
	def _setup_action_models(self) -> None:
		"""Setup dynamic action models from controller's registry"""
		# Get the dynamic action model from controller's registry
		self.ActionModel = self.controller.registry.create_action_model()
		# Create output model with the dynamic actions
		self.AgentOutput = AgentOutput.type_with_custom_actions(self.ActionModel)
然后AgentOutput又是由它做的初始化
class AgentOutput(BaseModel):
	"""Output model for agent

	@dev note: this model is extended with custom actions in AgentService.
	You can also use some fields that are not in this model as provided by
	the linter, as long as they are registered in the DynamicActions model.
	"""

	model_config = ConfigDict(arbitrary_types_allowed=True)

	current_state: AgentBrain
	action: list[ActionModel]

	@staticmethod
	def type_with_custom_actions(custom_actions: Type[ActionModel]) -> Type['AgentOutput']:
		"""Extend actions with custom actions"""
		return create_model(
			'AgentOutput',
			__base__=AgentOutput,
			action=(list[custom_actions], Field(...)),  # Properly annotated field with no default
			__module__=AgentOutput.__module__,
		)
这个文件是在views.py里面的
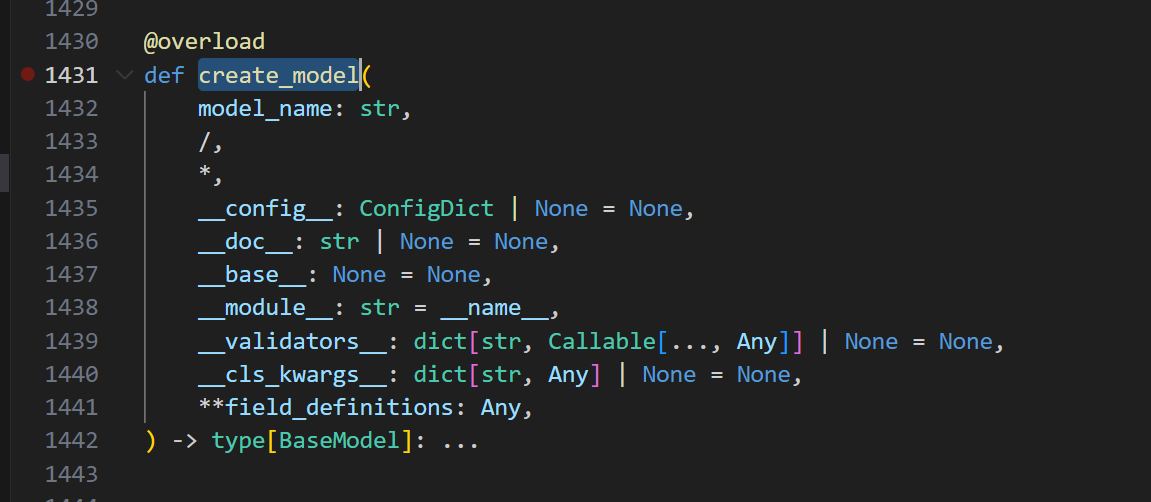
然后create_model这个函数是库里的一个函数
pydantic是pydantic的一个基础函数
我看看啥意思哈
`pydantic` 是一个用于数据验证和设置管理的库,在Python开发中广泛应用。`create_model` 是 `pydantic`
库中的一个高级特性,它允许你在运行时动态地创建模型类。

### 基本使用
下面是一个简单的示例,展示如何使用 `create_model` 创建一个基本的模型:

```python
from pydantic import create_model

# 动态创建一个模型
User = create_model('User', name=(str,...), age=(int,...))

# 创建模型实例
user = User(name='John', age=30)
print(user.dict())
```

在上述代码中:
1. 使用 `create_model` 创建了一个名为 `User` 的模型类。
2. 模型有两个字段 `name` 和 `age`,它们的类型分别是 `str` 和 `int`,并且都是必填字段(使用 `...` 表示)。
3. 创建了 `User` 模型的实例,并通过 `dict()` 方法将其转换为字典形式输出。

### 可选字段
可以为字段指定默认值,使其成为可选字段:

```python
from pydantic import create_model

# 动态创建一个模型
User = create_model('User', name=(str, 'default_name'), age=(int, 18))

# 创建模型实例
user1 = User()
print(user1.dict())

user2 = User(name='Tom', age=25)
print(user2.dict())
```

在这个例子中,`name` 字段有默认值 `default_name`,`age` 字段有默认值 `18`。因此,在创建 `User` 实例时,
可以不提供这些字段的值。

### 字段类型注解
`create_model` 支持各种类型注解,包括复杂的类型,如列表、字典等:

```python
from pydantic import create_model
from typing import List, Dict

# 动态创建一个模型
User = create_model('User',
                    name=(str,...),
                    hobbies=(List[str], []),
                    extra_info=(Dict[str, int], {}))

# 创建模型实例
user = User(name='Alice', hobbies=['reading', 'swimming'], extra_info={'height': 160})
print(user.dict())
```

在这个例子中,`hobbies` 字段是一个字符串列表,`extra_info` 字段是一个键为字符串、值为整数的字典。

### 继承现有模型
可以基于现有的 `pydantic` 模型创建新的动态模型:

```python
from pydantic import BaseModel, create_model

class BaseUser(BaseModel):
    name: str

# 基于BaseUser创建新的动态模型
NewUser = create_model('NewUser', __base__=BaseUser, age=(int,...))

# 创建模型实例
new_user = NewUser(name='Bob', age=28)
print(new_user.dict())
```

在这个例子中,`NewUser` 模型继承自 `BaseUser` 模型,并添加了一个新的 `age` 字段。

### 总结
`create_model` 是 `pydantic` 中一个非常强大的功能,它在需要动态生成模型类的场景中非常有用,
比如在编写通用的框架、插件系统或者根据配置文件动态生成数据模型等。通过灵活地使用 `create_model`,
可以大大提高代码的灵活性和可扩展性。
再回来
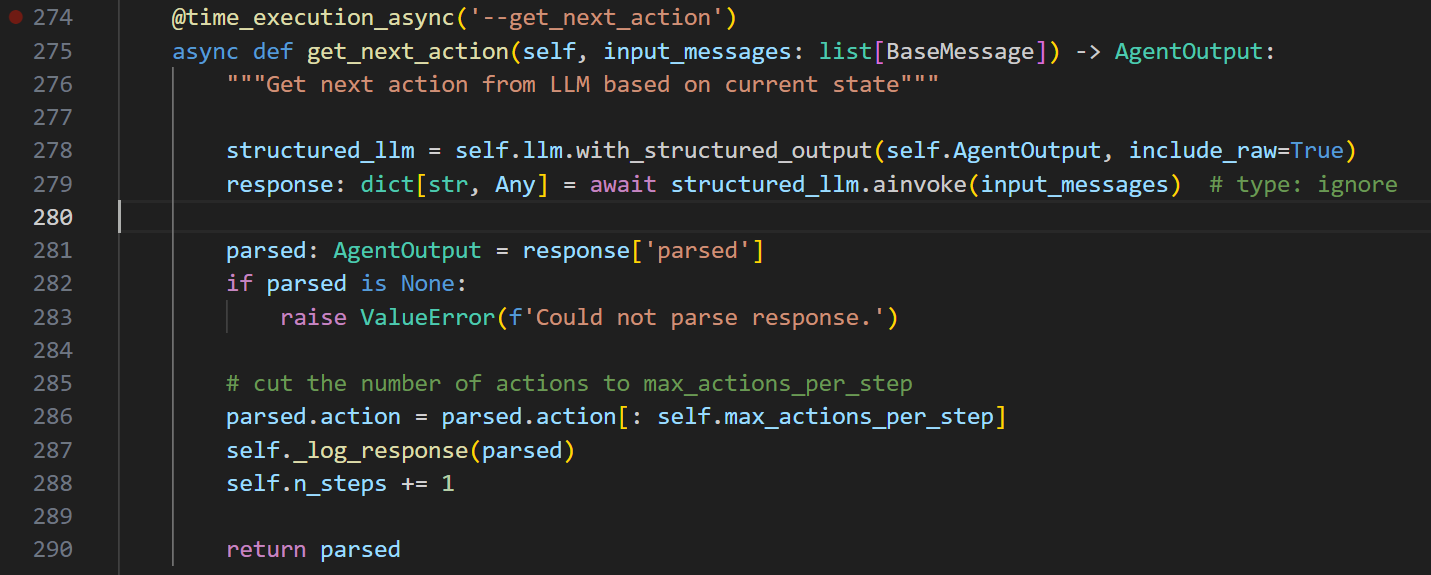
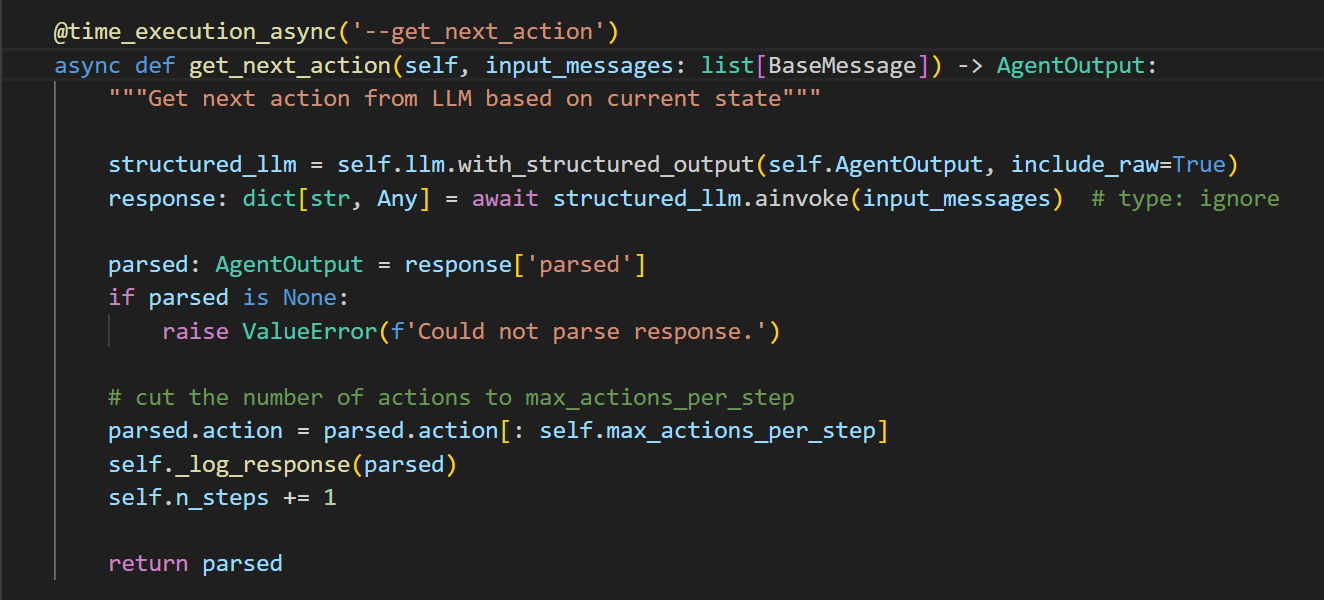
核心就是278、279这两句话
初始化一个结构化的llm
然后ainvoke对应的input_messages
拿到解析后的值,记录下来,并返回
就完了
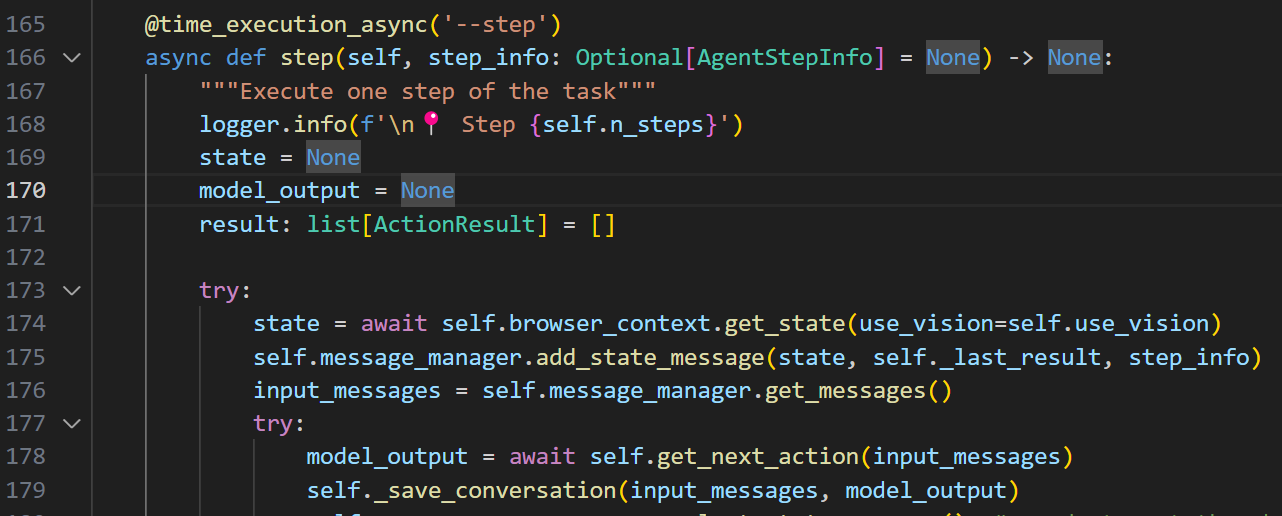
回到step来看
input的消息又是从message_manager里面来的